
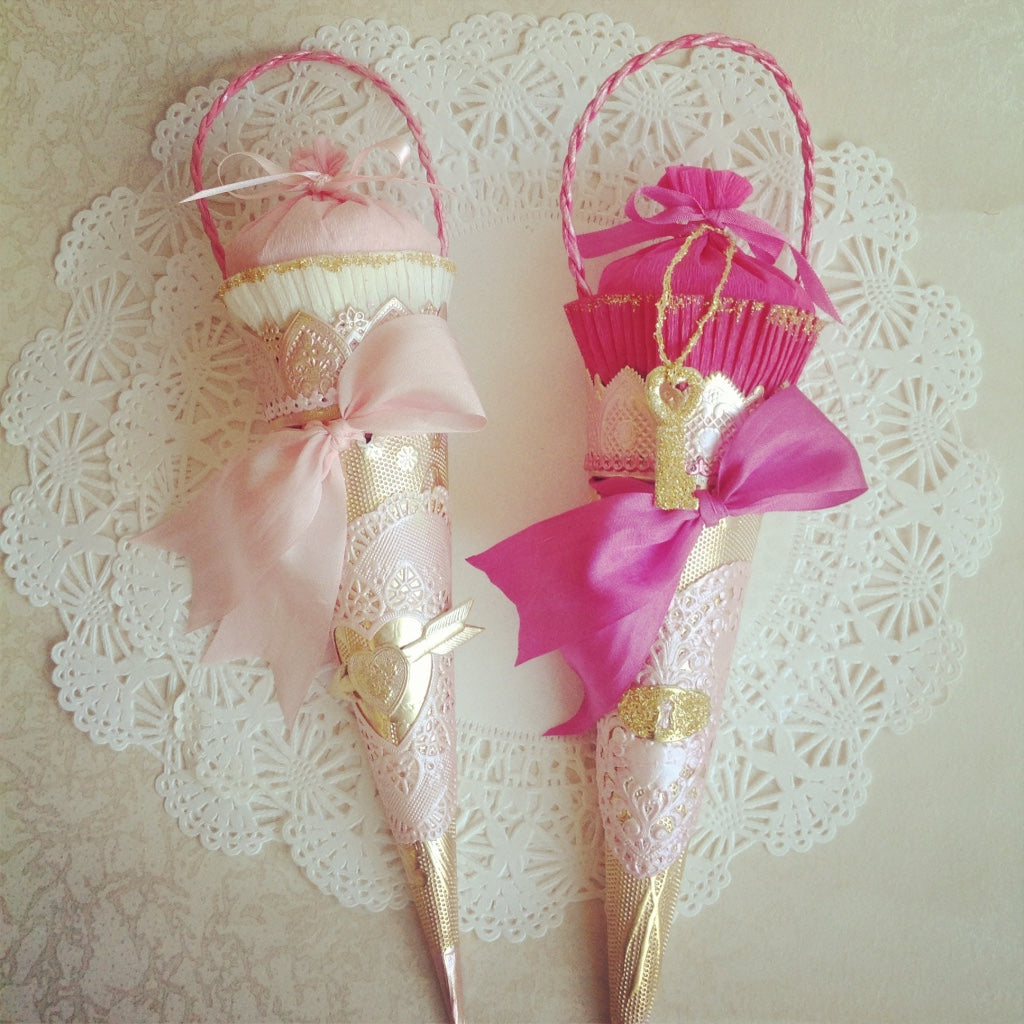
Using old world German embossed paper "Dresdens", nostalgic crepe paper baskets, a bit of real glass glitter, silk ribbons and paint, you can make a pair of these pretty gift or candy cones ready to decorate for Valentines or as a gift box. All the supplies are available as a kit from my shop Rose Mille, or separately if you like.
These instructions go along with the Valentine Candy Cones, but can be applied to any of our cone projects. The steps are basically the same for both the "antiquing" and assembly process.
The first thing you want to do is separate the embossed paper items that you want to antique. For the Valentine project, I antiqued everything in Martha Stewart's Pearl paint in Pink Taffeta. Place them on a covered surface, like brown kraft paper.
I like to water down the paint so that it goes on easier and leaves a transparent coverage. As you can see in the above photo, I start out with a small amount of paint, then add water drop by drop until the consistency is runny. Make sure you start with the paint in a small clean container, then add the water. You can dip your brush in clean water and then let the brush drop the water on the paint or use a straw by inserting it into the water, then cover the top end with your finger, taking it over to the paint and releasing all or some of the water. Stir the paint and water well with the brush.
Now paint all the items with quick strokes, no need to be neat here, just cover all the surfaces. Don't worry about the little bubbles that form, they will go away.
At this point you can rub off some of the paint on the high surfaces, leaving it only in the cracks and crevices, but from experience, I know that some of the paint will rub off as I work with the cones, so I am leaving this project it as it is to dry.
It may take a few hours to completely dry depending on the weather in your area, so be patient, it's best to wait.
While we are waiting for the paint to dry, lets work on the crepe paper baskets. Cut a piece of the crepe paper for each of the cones we are making. I started with a 6" x 6" piece.
Now you are going to glue one of the pieces to itself forming a tube, make sure the grain of the crepe paper is going up and down.
I have found the best glue to use on delicate papers such as crepe is Beacon's Zip Dry Paper Glue. The glue does not make marks, is quick drying and very light. It does however dry out in the bottle and they recommend putting the original cap on after you are done using it. I am constantly poking a needle or pin in the applicator tip, but once it's flowing it's fantastic.
Roll the other side of the paper and press it with the side that the glue is on, forming that tube.
Using that same glue, apply it to the inside of the crepe paper basket. Move up and down, side to side, however it works for you. Then quickly insert the crepe paper tube, pressing it against the sides of the basket from inside the tube. This can get tricky, just keep with it - its a pretty paper cone thingy, not brain surgery.
This is where I had to cut the paper down a bit. You may want to go around with some more glue in-between the tube and the basket to hide the little cup inside.
If you want to insert a little gift, or just some fluff, you can do that now, or skip this step until the entire cone is finished. After you tie it up with half of the satin ribbon, fluff, trim, fringe if you like the crepe paper above the bow.
Next is when I added the gold glass glitter to the edge of the basket, but it could have been done before the tube was inserted. Make sure you have a clean piece of paper under your work to catch the glitter, so it can be used again. Just pick up the paper and pour the glitter back into the bottle. You will need to do this a couple of times in order to finish this project.
Apply the Zip Dry glue or you could use regular white glue, to the edges of about half the basket rim.
Quickly but cautiously, pour the glitter on the glued edges, sprinkle it off and repeat gluing the remaining edges and applying the glitter. Pour the excess glitter back into the bottle.
If you are able to catch all the glitter, you will have plenty to use for both cones and then some.
Now that the embossed papers have dried, you can cut off the connector bumps and separate them ready to be worked with. Try to cut as close as you can without distorting the design.
The cones are rather stiff and I have found it easier to roll them on the edge of my work table to get them to form the cone.
A bit of manipulation of the bottom point is helpful as well.
Once you get it almost cone shaped, fold down the tab at right angles to itself.
Apply a generous amount of Beacon's 3-in-1 Craft glue to really hold it together, without taking up much glue space. You will need to press it from both sides, I have found a wooden spoon handle or thick knitting needle to be helpful here.
Smooth this out best you can.
Flip over the vintage heart doily and trace with a pencil the lower heart motif. Carefully cut this out on the pencil line.
Find the center of the front of the cone, by arranging the seam in the back, you will notice that there is one design, kind of looks like an upside down heart, at the top edge that is in the center. Keeping an eye on the center, place the heart doily, with enough glue on the back especially near the edges, (but not at the edges, the glue will spread a bit and you don't want it to be exposed). Press into place.
Cut one of the small arrows in half, glue each end firmly as shown.
Apply glue to a small heart and position it so that it covers up the space between the arrow parts, press in place.
Starting at the center back, apply a bead of glue around the top of the cone, just above the row of scallops as shown. Cut off excess, press in place.
Cut the silk ribbon in half so you have two pieces, one for each cone. Center the ribbon over the back of the cone so that it straddles the back seam, you will be inserting the ribbon through the openings as shown.
You may find it helpful to use a poker, such as a piece of floral wire, a skinny paint brush or knitting needle to help the ribbon through.
The goal is to have equal tails criss-crossed behind the center large scallop. Be patient, this will take some time until you get the hang of it. Try to straighten the ribbon as you go. Once you get it to look like the photo, you can tie a bow, or a half bow like I did. Don't forget to finish the ends of the ribbon by cutting a V shape by folding it near the edge and cutting at an angle. C A R E F U L !
This last step is simple, apply some glue above the stitch line on the basket and insert it into the cone. Okay not as easy as it looks. How to not scrunch the tied crepe paper in the basket. It may have been better to not have filled the crepe paper tube, or even have glued it on untill after attaching it to the cone. But you can always untie it, push it down and then tie it again.
But then it may be hard to work with the crepe paper while the basket is attached to the cone. ??
Not to worry, it's perfect!
Wala!
Please coment if you have any questions or nice thoughts, I will answer them here.
xo
mi